Progress invoicing is the ability to create partial invoices from a single estimate. Think of it as a billing installment plan you typically see when an insurance company sends you a bill for your policy and gives you the option to make payments on a monthly or quarterly basis.
Remember, estimates are non-posting transactions that do not impact your revenue account.
To convert an estimate to a sales transaction, you need to first verify that the status of the estimate is showing as Pending or Accepted.
Then, add the estimate to an invoice when it is time to invoice a customer. This process is called progress invoicing in QuickBooks Online.
Progress invoicing is a great way to invoice customers in installments that facility for weddings, meetings, funerals, events, etc.
Watch the video and read the guide to learn how to create a progress invoice in QuickBooks Online.
Steps to Convert an Estimate into a Progress Invoice
To get started, log into qbo.intuit.com.
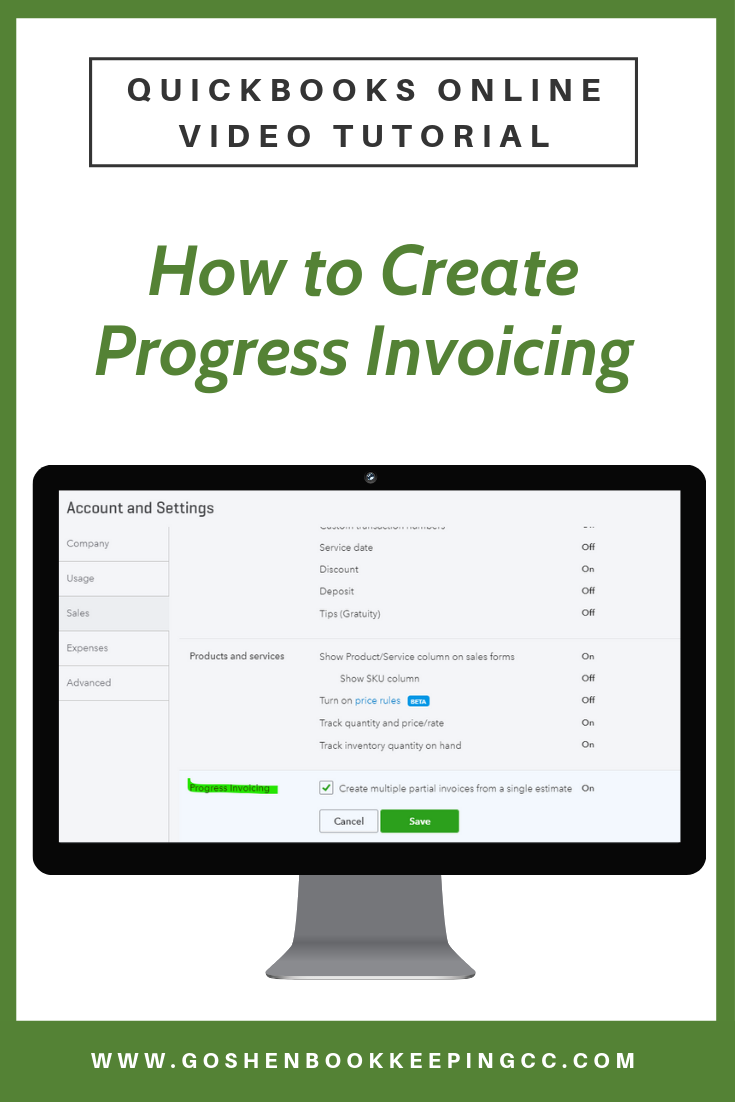
Click the Gear icon, select the account and settings, and then select the sales tab. Turn on progress invoicing and click done.
To convert the estimate we created previously, click on the Sales tab and then select All Sales.
Select the Estimates tab on the money bar to filter the list to only show or only display estimates.
Click create invoice under the action column for the estimate. Notice the pop-up window asks you if you want to create an invoice for the entire estimate amount or invoice by installments or do a custom plan.
The invoicing by installments is great if you have a policy of requesting payments at different intervals based on the delivery of service.
Select the default option “remaining total of all lines” and click create an invoice.
QuickBooks Online will pull in all the information from the estimate into the invoice. All you have to do is verify that the information is correct, blind copy yourself on the invoice, update the terms if needed, add a message on the invoice if needed, and add an attachment.
Do one final review of the invoice to make sure it has everything you need. Then click save and send to email the invoice to the customer.
In the send email screen, you can customize your email message to the customer and click your payment option if you are using QuickBooks Payments. Once done, click send and close.
Go back to the All Sales screen, if you click on the open invoices tab on the money bar, you will see the invoice we just created at the top.
Click on the customers’ tab, then locate the customer to view the list of transactions under their profile.
You will see the estimate and invoice you created. The system shows the estimate status as closed. If you click on the estimate to open the estimate screen and click on the linked transaction under the name field, you see that the estimate is linked to the invoice you created.
Now you know how to convert an estimate into a sales transaction in QuickBooks Online using the progress invoicing feature.
Are You On Pinterest?
If you enjoyed this post, share it!
Questions about using QuickBooks Online to manage your nonprofit’s finances? Contact me - I am happy to help!